


Today we will talk about coolers. The term "cooler" was formed by transcribing the English word "cooler", which means "cooler". In simple terms, a cooler is an ordinary fan used to cool the central processor, video card, power supply and other heating elements of the computer.
The cooler has one unpleasant side - they make noise during their operation. And the more coolers are involved in your PC, the more noise they make. In this article, we will look at how you can simply and effectively reduce the noise produced by a fan.
Why are coolers noisy?
If you do not take into account special fanless modifications, then each computer includes two or more coolers. As mentioned earlier, this can be a cooler on the processor, on the graphics accelerator, in the power supply, as well as fans installed on the side and rear walls of the system unit case. And each of the listed fans creates a separate noise, and together it sometimes turns into a rather unpleasant hum. Some PC users have simply gotten used to this noise in their system unit and do not pay attention to it, believing that such a hum is in the order of things and nothing can be fixed. But there is good news! In 98% of cases, the noise from the operation of fans in the computer can be reduced by at least 10%, and as a maximum - by all 90%.
As you may have guessed, the noise level in a working fan depends mainly on its rotational speed. As the rotation speed decreases, the noise of the cooler also decreases. Luckily for us, there are wonderful programs with which you can easily control coolers by changing their speed. Of course, you can also reduce fan noise by replacing it with a more expensive and quiet analog. However, not always such a replacement will give the expected effect, proportional to the funds spent. Therefore, we will consider a less radical way to reduce noise, which is a program for adjusting the speed of the cooler. Naturally, reducing the number of fan revolutions has its limit, which does not threaten the computer overheating. And if the adjustment is made incorrectly, then problems can arise. We will try to explain everything in as much detail as possible, so that you have absolutely no problems when changing your settings.
To complete the picture, it is worth mentioning that in addition to programmatically changing the cooler speed, there are several other ways by which you can reduce the fan speed: the cooler speed control system, which is hardwired into the BIOS; the use of a special device - reobas; artificial lowering of the cooler supply voltage.
If the control works well from the BIOS in your computer, then you can skip this article further. But, as practice shows, very often the BIOS regulates the cooler speed only superficially. Understatement occurs with a large margin of safety, which, unfortunately, is not always justified and does not lead to a decrease in fan noise.
Now let's try to define reobas. What is it and what does it serve? Most often, a reobas is a device that is mounted in a 5.25” or 3.5” computer bay. It serves to manually adjust the rotational speed of coolers in the system unit.

Sometimes there are reobas models made for a PCI slot or even made in the form of a regular adapter for a cooler power cable. A similar device has one or several controls on the front panel at once, with the help of which the fan speed is adjusted. When choosing a reobas, first of all, you need to pay attention to the presence of a sufficient number of adjustment channels. In simple words, you need to buy a reobas that can adjust the speed of all the fans in the system. Also, when choosing a reobass, it makes sense to pay attention to the length of the wires, so that it would be enough to connect all the coolers. Additionally, you need to clarify the possibility of connecting the reobass to the FAN connector on the motherboard, which is necessary to display changes in the fan speed in the operating system. Of course, this option may not be needed if the selected reobas has an LCD display, which will display the temperature from the sensors and the rotational speed of the coolers. But any reobas costs money, and not everyone has a free amount of money that can be spent on such a little thing, far from being essential. Therefore, to save your money, consider a program that serves to reduce the number of cooler revolutions - SpeedFan.
Cooler management software SpeedFan
SpeedFan is a multifunctional and completely free program. SpeedFan is able to control the speed of the cooler in automatic mode. You will immediately have to upset you a little that this program is not able to work on all modern laptops, but this fact can be verified only by running these utilities. In addition, the SpeedFan program is able to regulate the rotation speed of only those fans that can be controlled by the motherboard from under the BIOS. For example, in the case we are considering, from the BIOS you can enable cooler control exclusively for the central processor. But at the same time, you can view the current rotation speed of two more fans. Now the most important thing, before you start using the SpeedFan program, you must definitely disable the cooler control in the BIOS of your computer! If this is not done, then the work of coolers may go according to the following scheme. When the SpeedFan program is loaded, it reads the current cooler revolutions, which it takes as the maximum values. Therefore, if by the time the program is launched, the BIOS cannot spin up the fans to the maximum speed, then the program will not do it either. Let's assume the following situation: by the time the program was launched, the fan on the central processor was rotating at a speed of 1100 rpm, SpeedFan, taking this rotation speed as the maximum, could not increase it when the processor warmed up further. As a result, the processor will continue to heat up to a critical temperature, and if its automatic overheating protection does not work, it may fail without having time to turn off. An experienced user, of course, will be able to catch this moment, noting that with an increase in the load on the processor (let's say the launch of a game), the fan did not increase its speed (read, the noise it produces increased), but such a risk is not justified. Therefore, we remind you once again that before starting the SpeedFan program, be sure to disable the regulation of the speed of rotation of coolers in the BIOS.
During the first launch of the SpeedFan program, a window will appear on the monitor screen offering a description of the program's functionality. Here you can check the box and close it, so that the next time you start this message is not displayed on the screen. After that, the program will read the parameters of the microcircuits of the motherboard and the value of the temperature sensors. As a result of the successful completion of this task, you should see a window with a list of the current fan speeds, as well as the temperature of the sensors on the monitored PC components. After that, you need to go to the "Configure -> Options" menu and change the language to "Russian".

As you can see in the screenshot, the window also displays the processor load level and voltage information.
Block "1" lists the detected fan speed sensors called Fan1, Fan2, etc. At the same time, the number of sensors in the list may exceed the one that actually exists. Pay your attention to the values, for example, line 2 - Fan2 and line 4 - Fan1, they have real numbers of 2837 and 3358 revolutions per minute (RPM). But the rest of the indicators are either equal to zero, like the value of Fan3, or the value called "garbage" is indicated (in the picture this is the value indicated in the first line). We will remove the extra lines later.
Block "2" indicates the temperature sensors that are detected in the system. GPU is the chipset of the video card, HD0 is the hard disk temperature sensor, CPU is the sensor on the central processing unit (instead of the CPU in the Temp3 picture). The rest of the readings are garbage (the temperature of the sensors cannot be 17 or 127 degrees in the working system). This is the main drawback of the program, that it is necessary to guess which value corresponds to which component of the system block. For the sake of truth, it is worth mentioning that on the official website you can choose the necessary configuration from the known ones, but this procedure is not easy, besides, all descriptions are available only in English.
If there are difficulties with the identification of sensors, you can use another utility that serves to obtain the parameters of the system as a whole, for example AIDA64. And after running this utility, it will be easy for you to compare its performance with the SpeedFan parameters, thereby determining which temperature and speed indicator refers to which component of the system unit.
Block "3" contains speed controls Speed01, Speed02, etc. With these adjustments, you can set the rotation speed in percentage (sometimes they can be labeled as Pwm1, Pwm2, etc.). At this stage, we are interested in one question: which of the six Speed01..06 indicators is responsible for which Fan1..6. To determine this, you need to alternately change the value of each Speed from 100% to 85-50% and observe what speed of a particular Fan has changed. Thus, having run through all the lines of Speed, remember which of them corresponds to which line of Fan. We repeat once again that only those fans that the motherboard can control from the BIOS will be regulated.
Fan assembly
Speedfan Settings
Now let's move on to the program settings. To do this, go to the "Configuration" menu and rename all sensors with names that you understand, so that in the future you no longer get confused about which value refers to which component. In our example, we will programmatically control the rotation speed of the cooler on the central processor.
Go to the “Temperatures” tab and find the temperature sensor on the processor that you defined a little earlier (in our example, this is Temp3) and click on it first once, and then a second later, after which you can enter absolutely any one you like in the name field name, such as "CPU Temp". Then, in the settings field below, enter the value of the desired temperature that will be maintained by the program at the minimum possible rotation speed of the selected cooler, and also indicate the “alarm” temperature at which the maximum fan speed will be turned on on the selected device.

In our case, the desired temperature is 40 degrees, and the alarm temperature is 50 degrees Celsius. Naturally, for each case, this temperature will be different, so the optimal ratio can only be selected by experimentation.
After that, you need to expand the branch and uncheck all the checkboxes, except for the Speed, which adjusts the Fan speed corresponding to your cooler. In our example, this is Speed04. Next, uncheck the boxes next to the remaining temperatures that you do not want to be displayed in the main SpeedFan window.
On the "Fans" tab, find the necessary coolers, rename them according to their purpose, and disable the rest.

Fans
After that, go to the "Speeds" tab. Go to the Speed line that is responsible for the desired fan, rename it (in our example, it is CPU Speed) and set the necessary parameters: minimum - the minimum percentage of the maximum cooler speed that can be set by the program; maximum – percentage of the maximum cooler speed. In our case, the minimum is set to 55%, and the maximum is set to 80%. It is not surprising that the cooler control program cannot set a value equal to 100%, because in the “Temperatures” tab we have already set the “alarm” value, upon reaching which the cooler speed will be forcibly set to 100%. Also, in order for the regulation to take place in automatic mode, do not forget to check the "Autochange" checkbox.

Autochange
This completes the settings, you can go to the main window of the program and check the "Auto fan speed" checkbox. After that, the cooler speed will be adjusted automatically. Of course, setting the optimal fan speed settings the first time will not work, so you will have to experiment a little.
Additional SpeedFan Options
The SpeedFan program has a whole bunch of additional functions and parameters with which it can control the speed of the cooler for each individual. It makes no sense to consider all of them, since it may take even a single page, we will describe only a few that are most useful from our point of view.
Go back to the "Configuration -> Options" tab. After that, check the "Run minimized" checkbox. It is necessary, as the name implies, in order for SpeedFan to start when Windows boots in minimized mode. If this checkbox is not checked, then after the operating system boots, the main window will be displayed on the desktop. It should be noted that if the program does not start automatically, then its shortcut should be added to the startup folder.
The next checkbox that needs to be set is called "Static icon". You need to activate this option so that the program is displayed in the system tray as a simple icon, and not as numbers. But this, as they say, is a matter of taste.
The “Minimize on close” checkbox should be set so that after clicking on the “red X” the program does not close, but simply minimizes it to the system tray.
The “Full fan speed at exit” checkbox is set so that after the program is closed (exiting it), the fan speed is set to the maximum. If this item is not activated, then after closing the program, the turnover will remain at the level corresponding to the moment of closing. And this, with an increase in the load on the processor, is fraught with its overheating, since nothing controls the processor cooler.
Summing up the results of the article, we can safely say that now with the help of the SpeedFan program you can independently adjust the speed of the coolers in the system unit, and the investigator can also reduce the noise in your apartment.
It is no secret that with the increase in the speed of computers, the level of heat generated by the system components also increases: the chipset of the motherboard is heated, the central processor is seriously heated (at high load, the temperature of the processor core can reach 90-110 ° C), the graphics card does not lag behind the central one in terms of heat dissipation. the processor of the video card and even power supplies with an increase in power began to heat up very much. Therefore, increasingly powerful and large cooling fans are required for all components, which can be very noisy. However, some of the problems associated with increased system noise can be solved by software and even BIOS settings. For example, modern processors and operating systems automatically reduce power consumption during periods of inactivity to help keep devices cool, but they rarely slow down noisy fans.
Smart Fan Control
In most modern computers, the fans can be controlled through the Basic Input/Output System (BIOS). The easiest way is to change the settings in the BIOS to turn the fans on and off depending on the temperature (if, of course, there is such a possibility).
Some BIOS systems have in the menu (PC Health Status section) some kind of function such as Smart CPU Fan Temperature, CPU Smart Fan Control, or even Noise Control. It is enough to enable this function, and the noise from the fans will bother you only at the time of loading (usually, regardless of the temperature set in Smart Fan Control, the processor fan runs at full power for several seconds when the computer is turned on, and then slows down) or at those rare moments when you really load the computer with some complex operations.
After enabling this option, during operation, the processor fan will increase speed only when the temperature rises, and if there is no load, it will decrease (the fan may even turn off altogether).

Note that the function of smooth automatic fan speed control Smart Fan Control usually works reliably only on those fans that are equipped with a fourth control wire. In addition, the presence of CPU Smart Fan Control sometimes depends on the installed processor. By the way, this function is usually not enabled by default, so in any case you will have to configure it manually (configuration is usually limited to enabling this function and / or setting critical temperatures).

Of course, reducing the speed of the fans will inevitably lead to an increase in the temperature inside the system unit, but as long as the processor, hard drive and other components operate within the acceptable temperature range (you can find out from the equipment supplier), nothing threatens the hardware. Safe operating temperatures are roughly around 70°C for processors and 55°C for hard drives. The maximum allowable operating temperature for Intel processors can be found on the company's website (for example, for Pentium 4 processors - http://www.intel.com/support/processors/pentium4/sb/CS-007999.htm). For AMD processors, you can check the Case Temp setting on the Technical Documents Page (). Recall that for a particular processor, stable operation temperatures may vary. The maximum temperature for the hard drive can be found on the website of the respective vendor.
Noise reduction technologies in Intel Core 2 Duo
 Intel's new multi-core processors (including the Core 2 Duo) have relatively low power consumption and, as a result, generate less heat. This feature can be used in different ways: either to overclock the system, or, conversely, to reduce the noise from the cooling system.
BIOS setup in motherboards for Core 2 Duo (for example, on the i975X chipset) is simple - it consists in activating additional features such as Intel SpeedStep (reducing power consumption in idle mode of the processor), and AI Quiet technology (intelligent fan control to reduce noise ).
In silent mode (Silent mode) in a computer with a conventional cooling system, even after several hours, the temperature of the processor does not rise above 35-40 ° C, and in a system with passive cooling, the processor heats up to 50-55 ° C. The temperature of hard drives rarely exceeds 40-45°C, and the temperature in the case is set at 35-40°C. These are very good results for modern computers, given that in a truly silent mode, the air circulation in the case is very weak.

AMD Cool'n'Quiet Technology
AMD's Cool'n'Quiet technology is Intel's answer to old problems with heat and noise generated by the cooling system. The new technology, designed to reduce power consumption and therefore reduce the level of noise produced by the cooling system, has found its way into all modern chipsets for motherboards designed for AMD processors. The processor fan and other cooling fans connected to the motherboard will only increase speed when the temperature rises, and if there is no load, they may turn off altogether.

Recall that AMD platforms are usually also equipped with D.O.T. (Dynamic Overclocking Technology) with the most automated overclocking of 10%.
We also note that each manufacturer of chipsets and motherboards for a particular platform also contributes its own additional technologies to support such solutions to reduce noise from computers.
MSI's multifunctional CoreCell technology
AMD's strategic partner, motherboard manufacturer MSI, has developed its own features to support the AMD Cool'n'Quiet solution.
MSI's motherboard adopts the original multifunctional CoreCell technology. The CoreCell Chip includes four components: Speedster (a technology that allows flexible BIOS settings), BuzzFree (a technology that reduces system noise by automatically adjusting fan speeds), PowerPro (a power management technology that can reduce power consumption), and LifePro (a technology that maximizes prolonging the life of the motherboard, processor and cooling fans by constantly monitoring their condition).

Speedster technology provides the user with the ability to flexibly adjust BIOS settings during overclocking, including asynchronous bus (FSB) and memory speed modes, the ability to increase the voltage applied to memory in 0.05 V steps to adjust it, and the voltage applied to the processor core with with a minimum step of 0.0125 V.
BuzzFree technology is designed to check the current load of the system, its temperature and change the speed of rotation of the cooling fans in accordance with the state of the system. Thanks to BuzzFree, the level of noise produced by the system is significantly reduced (by 10-50%), and annoying buzzing of fans practically does not bother users. We also note that BuzzFree improves the playback quality of audio and video files. This technology is coordinated with Cool'n'Quiet technology from AMD.
PowerPro technology extends the life of your motherboard and fans by keeping them in optimal condition. This system also monitors the load on the motherboard in order to avoid negative factors that could lead to a system crash.
PowerPro is a flexible system power management that reduces power consumption by up to 67%, ensures stability and increases performance.
LifePro technology also increases system reliability by maintaining the most favorable state of the system as a whole and by component. LifePro monitors all operations to prevent system failure and extend the life of the motherboard, CPU, and other components.
For the AMD Dual Core platform, MSI has implemented Dual CoreCell, a feature-rich technology similar to CoreCell but for dual-core AM2 motherboards.
MSI Dual CoreCell is MSI's software solution for hardware monitoring, overclocking and cooling management.
Compared with CoreCell technology, Dual CoreCell is focused not only on improving performance, but also on improving the user experience of the system. It includes four sections: performance level, noise level, and image and sound quality, providing the user with a working environment that satisfies him.
SilentTek - noise reduction technology from AOpen
Almost all motherboard manufacturers are engaged in developments in the field of noise reduction. For example, AOpen, in addition to increasing the performance and functional stuffing of motherboards, pays a lot of attention to the ergonomics of its devices, even if these are cheap solutions. To reduce the noise level from a running computer, special tools are used that allow you to adjust the fan speed depending on the temperature and limit the maximum rotation speed of the optical drive so that it also produces less noise.

The original development of AOpen engineers is called SilentTek - this function is built into the BIOS and also has a special proprietary management utility for Windows.
SilentTek manages features such as Hardware-Status Monitoring (monitoring system status), Overheat Warning (warning about overheating) and Fan Speed Control (fan speed control). With SilentTek, you can achieve the optimal balance between noise, performance and system stability.

When using a computer at home, SilentBIOS technology built into the BIOS can be an invaluable advantage, as well as support for software control of the speed of rotation of all fans, which allows you to minimize system noise directly during operation.

AOpen's proprietary SilentTek utility allows you to monitor the operation parameters of various PC components (voltages, temperatures, etc.) in real time, and also has a set of special features with which you can choose the best balance between noise (fan speeds) and cooling motherboard, processor and power supply.
Instead of a conclusion
We did not find any shortcomings in the operation of these systems, however, it should be borne in mind that these technologies are still relatively new and therefore may well have some roughness in operation until the BIOS versions that support them are fully debugged.
But even if there is no such function in the BIOS (or it is not open in the settings menu), then you can achieve relative silence using some special program. For example, you can note the free program SpeedFan (http://www.almico.com/speedfan.php), which has a large database of modern motherboards, reads temperature sensors, and then changes the fan speed based on temperature indicators (you can use the SpeedFan program). found on our CD-ROM).
However, for such a program to work, the following conditions must be met: the readings of hardware temperature sensors must be readable by the program (that is, the program must “know” your motherboard), the computer hardware must provide a change in the fan speed, and, finally, the user will have to configure program and monitor the progress of its work (at least find out the safe temperature range at which certain computer components will not fail).
The processor makes a lot of noise - the problem of most people who use system units (in common people, out of ignorance, they call the processor). To be more precise, then fans are noisy, which cool the system from overheating.
There are various reasons why a fan may make noise. Most often, they need to be thoroughly cleaned of dust (including the cooling radiator) and lubricated. But there is one more thing that caused noise at my workplace - the speed of the cooler.
Coolers are divided into two types: with the function of speed control by software and without. Luckily, I have a Sumer cooler that supports software rotation control.
Everything could be perfectly configured in the BIOS, which itself regulated the rotation of the cooler. But there was one thing. The principle of adjusting the cooler with the BIOS is that you set the minimum rotation speed that the BIOS adheres to. And as the temperature rises, the cooler rotation speed increases in order to lower it.
And since I work in the range of 45-50 degrees, the system thinks that this is overheating and always turns the fan, so this is not an option. It was necessary to manually control the rotation speed of the cooler without any resistors, etc. A couple of searches on the Internet and found program to control the speed of rotation of the coolerspeedfan.
Fortunately, the program turned out to be free and compatible with Windows XP and Windows 7 (x32-64). I also ran it in Ubuntu Linux via Vine, but the program refused to work.
Speedfan setting. Increasing and Decreasing Cooler Speed
To get started, go to the download page and download the latest version of the program. Now that the program is installed, it can take about a minute to load (sometimes much faster). The first launch of the program reads information about the hardware and coolers that are installed. Here's how I have it set up:
- all hints disabled
- the program starts with Windows
- launch program in tray
- when "closing the program" it is minimized to tray
The program has a lot of settings, and since the interface is in Russian, it’s easy to customize it for yourself. Initially, the program is installed in English, to install the Russian language, click on the configuration button:
In the window that opens, find the "Options" tab and select the language you need in it and click Ok:

Now the program works in Russian. Hints are turned off at the moment they are shown. They hinder more than help. Therefore, the next time you see a hint, check the box next to "Do not show again."
To the program was loaded withWindows, open start and select the startup folder. In this folder you need to copy the shortcut to SpeedFan. This is the easiest option.
If you want the program to be loaded invisibly (in the tray), then go back to the settings tab and check the box next to “launch minimized”.
In the same tab, check the box “Minimize on Close” and when you click on the cross in Windows, the program will not close, but will be minimized to tray. I think this is very convenient, since it is inconvenient to open and close the program every time.
The coolers themselves are defined in the main window of the program. These windows with percentages are the speed controllers. I have three coolers in my system, so exactly three are displayed. By changing the power in percent, the speed will decrease or increase. Accordingly, 0% fans stop, 100% fans spin at full power.
After a six-month break, the author of the SpeedFan utility reminded himself of himself by releasing a new release. The program is a compact but very functional tool for monitoring computer hardware. Allows you to read voltages, fan speeds and temperatures from monitoring chips. Displays S.M.A.R.T. status information as well as temperatures for hard drives. Works with HDD on EIDE, SATA and SCSI interfaces (most of "software" IDE/SATA RAID controllers, unfortunately, are not supported). It is also possible to adjust the system bus frequencies on some motherboards, but development in this direction is actually frozen. Works under Windows 9x, ME, NT, 2000, 2003, XP and Vista operating systems, as well as x64.
advertising
The main highlight of the program is the regulation of fan speed depending on conditions (for example, processor temperature), but again, with hardware support from the equipment. In addition, it can collect statistics on the parameters taken and write information to a log file, draw graphs of changes in temperatures, voltages and fan speeds.Temperature directly affects the quality and duration of the computer elements. That is why it is important to control the literacy of the cooling system. Dust should not accumulate in it, all computer fans must operate normally, if necessary, increasing speed during heavy loads.
Most users work at the computer in standard mode, without loading components in high-performance games and applications. In this case, the coolers on the computer may not be configured, and in such a situation they will work at maximum or close to maximum speed. To reduce noise during computer operation, you need to adjust the operation of coolers by reducing the speed of rotation of their fans.
How to adjust the speed of computer coolers
The rotation speed of the computer cooling fans is initially set at the level of the motherboard. It is determined in the BIOS, and quite often the automatically set settings turn out to be incorrect. In most cases, the rotation speed of the coolers is set to the maximum, which makes the computer very noisy during operation, but does not require such serious cooling.
There are 3 main ways to adjust the rotation speed of computer coolers:

Within the framework of this article, it will be precisely the third option for software adjustment of the speed of rotation of computer coolers that will be considered.
How to adjust the rotation speed of computer coolers
 There are hundreds of applications that allow you to adjust the rotation speed of your computer's coolers. At the same time, some programs allow you to adjust only the speed of the fans of only certain components.
Of the most convenient and simple programs for setting the rotation speed of computer coolers, SpeedFan can be distinguished. The app is free and can be downloaded from the developers website or other trusted sources on the internet. After downloading the program, you need to install it, and then run it. The first time you start the SpeedFan program, an informational message may appear, which you need to close.
Checking the rotation speed of coolers

This is followed by a block of indicators of the speed of rotation of the coolers (measured in RPM - the number of revolutions per minute) and the temperature of the computer components. Let's take a look at what each indicator means:

It should be noted that all the above designations are conditional, and they may vary. Not every motherboard gives information about the name of a particular connector for connecting a cooler on it. For example, on some motherboards in SpeedFan, you can see a picture like in the image below, that is, all coolers will be connected to the Fan1 - Fan5 connectors, without an exact definition of the purpose of each of them.

It is also important to note that the SpeedFan program only allows you to control coolers that are connected to the motherboard. The fact is that the 3-pin connector from the fan can be powered from the motherboard or directly from the power supply. If it is powered from the power supply, then it will not be possible to regulate its rotation speed. It is recommended to connect all coolers to the motherboard.
To the right of the designations of the speed of rotation of the coolers is a block with information about the temperature of the computer components. It is worth noting that SpeedFan is not the most accurate diagnostic tool in this regard, and it does not always determine the temperature accurately. If you are in doubt about one or more indicators, it is recommended to download more professional temperature monitoring software, such as AIDA64 or HWMonitor.

Setting the rotation speed of coolers
As you can understand, in the upper window of the SpeedFan program there are blocks with information about the operation of coolers. Below are the tools for adjusting the fan speed in the computer. They can be labeled Pwm1 - Pwm3 or, for example, Speed01 - Speed06. There is not much difference, since it is impossible to determine by such names which of the coolers this or that adjustment is responsible for.

To decrease or increase the cooler rotation speed, you need to press the corresponding buttons up and down in the graphs with the fan speed. When pressed, you should observe the reaction of the coolers in the diagnostic information above. Thus, it will be possible to determine which fan is responsible for one or another setting.
Important: When reducing the fan speed to reduce the noise level during computer operation, do not forget to control the temperature of the system unit components to avoid overheating.
You will also be interested in:
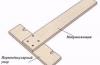
Today, quite often you can find homemade circular saws. Circular with their ...
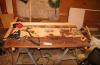
Stationary type circular saws are quite expensive on the market. However, if desired...


Have a good day everyone! In this post, we will focus on such an important topic as politics ...

Stress Stress is placed only on a long syllable. Never placed on the last syllable...

